(8 PM – promoted by TheMomCat)
As many of you know, last Tuesday was The Girl’s (henceforth referred to as The Woman) 20th birthday. We had originally planned to bake a cheesecake together Sunday past, but she had a better idea. She asked me very sweetly, “Do you know what would make this cake really special for me? If you cooked it by yourself since it is my birthday cake”. Of course I agreed!
I got all kinds of suggestions from the community here Saturday before last, and I appreciate all of them. I finally took the basic recipe from the Kraft site and modified it, and the result was wonderful!
I shall give you the recipe first, then a photographic gallery with my comments about how to do this. It is not hard to make a cheesecake that does not dry out or get weepy, but it is easy to mess one up irretrievably! You should read the entire piece before trying the recipe.
Here is the list of ingredients and their quantities: (Preheat oven to 425 degrees)
For the crust:
1¾ cups of graham cracker crumbs. Do not use flavored ones unless you know what you are doing!
1/3 cup melted butter
Take the crumbs and mix with the butter thoroughly. Put into nine inch springform pan, with half in the bottom and half around the rim. Do NOT oil or spray the pan or the crust will fall off of the sides.
Bake for eight minutes in 425 degree oven. Remove and allow to cool. Reduce oven to 325 degrees whilst you make the filling.
For the filling:
Three, eight ounce packs of full fat cream cheese, and do not use the kind in tubs.
One cup of full fat sour cream
1¾ cups granulated sugar
Two teaspoons vanilla extract
Two teaspoons lemon zest
One tablespoon cornstarch
Three whole, large eggs
Allow all ingredients to come to room temperature. Cream the cream cheese with a wooden spoon until soft. See my comments for more detail. Add the sugar and cream until well blended. This is harder than creaming butter with sugar.
Add the sour cream and blend until homogeneous, and you can add the lemon zest and vanilla extract now as well.
Add the eggs, one at a time, and blend until smooth with the wooden spoon. When adding the last egg, whisk the cornstarch with it until free of lumps, then blend in with the rest of the filling.
Assembly and baking:
Pour, well scrape, the filling into the cooled, prebaked crust. Place in the center of your now 325 degree oven, and place a large, metal pan of hot water on the rack under the one holding the springform pan.
Cook for 70 minutes and DO NOT OPEN the door! After that time has elapsed, turn off the oven and allow the cake to cool slowly with the oven door ajar. You can leave it there a couple of hours. Do not expect to eat a cheesecake the day you make it unless you start really early.
After the cake feels pretty cool, take plastic wrap (use Saran or other polyvinylidine chloride wrap, not polyethelene) and gently press it to the surface to prevent drying.
Refrigerate overnight to set the cake.
Remove springform side the next day and top.
Topping and serving:
I used home canned cherries from a neighbor’s tree, but you can do essentially the same thing with commercial sour pie cherries.
1 pint Mason jar of unsweetened pie cherries
¾ cup sugar
Water to be determined
Corn starch (depends on how much water you use)
Put the cherries and juice in a saucepan and add the sugar. Simmer for a few minutes, then allow to cool. It is best to make this up the night before so that the cherries can absorb sugar. If you add more water to make more topping, use a little more sugar.
Refrigerate overnight. Bring back to a simmer, and for one pint of cherries disperse one tablespoon of cornstarch in about a quarter cup of water, then stir into the simmering cherries. Simmer until it clears, stirring gently and constantly to keep the starch from scorching on the bottom.
Allow to cool (I put the pan in an ice and water bath) evenly over the top of the cheesecake. It is now ready to serve.
This is a very rich dish, so serve tiny slices. I am thinking that you might get 16 really little ones, but it is so good that I suspect that you will get fewer slices, or eat more than one of the tiny ones!
Here is the photogallery and details about each step.
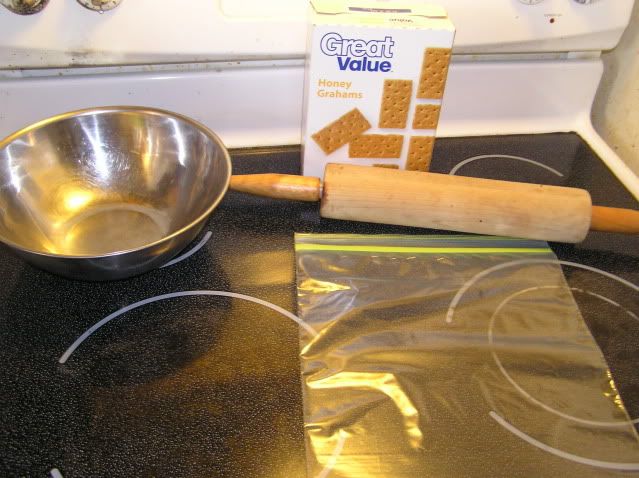
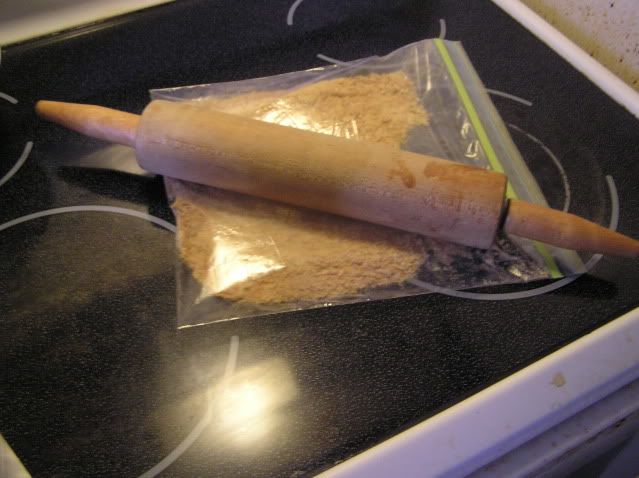
You can buy graham cracker crumbs already smashed, but who go to the expense? Besides, they are hard to eat with a glass of milk. Just take graham crackers, place in a gallon zipper bag, and roll the bag with a rolling pin. Be sure and use really crisp ones because ones on the soggy side do not smash well.
Here is what they look like in the bag.
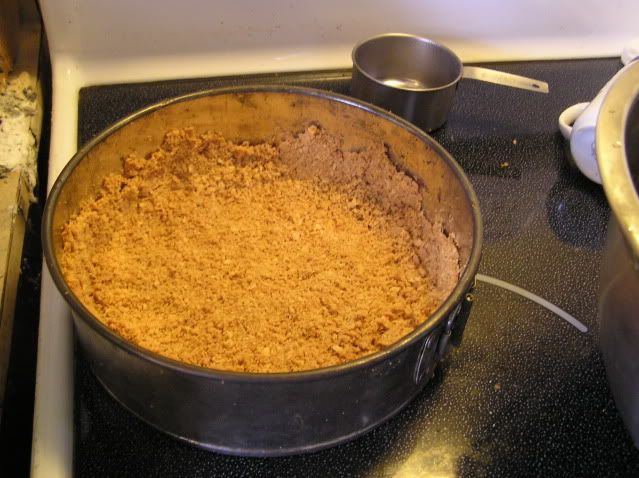
Once you smash the graham crackers, add the melted butter and mix well. Press them into the springform pan per the recipe. Here is what it will look like after baking for the eight minutes. Do not worry if it is not even on the sides; it is difficult to be perfect and it makes no difference. Be sure and turn down you oven to 325 degrees after baking the crust.
It is important to prebake the crust to allow Maillard browning reactions to occur (enhances flavor) and to stiffen it a bit. Although Graham crackers were baked at a high temperature when they were cooked, when you add the butter and cook it again it really brings out a good flavor. Prebaked crusts also tend to be less soggy than unbaked ones.
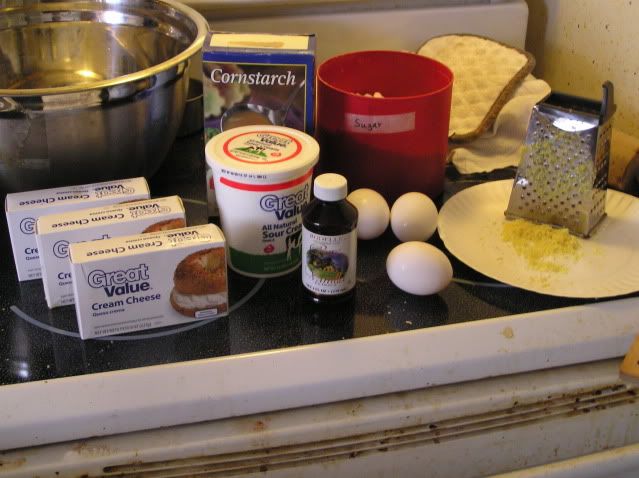
It is important to allow everything to come to room temperature before making the filling. The cream cheese is more pliable and thus easier to mix with a wooden spoon. Use a big bowl to mix. Here are the ingredients and tools, except I forgot to include the wooden spoon. I used one of the flat ones with a hole in the middle.
How one handles making the filling is one of the two critical steps for making a cheesecake successfully. We are going to get a little Geeky here, but it is important. First and foremost, a cheesecake is really just a very dense custard. Custards can be tricky to make, but if you follow these steps you will come out fine. One thing that a cheesecake is NOT is a souffle. Entraining air into the filling will make it rise and fall, and that causes cracking. That is why you should mix by hand rather than with beaters.
Work the cream cheese first until it is very pliable. Then add the sugar, a little at a time, and mix until it is well blended. For things that can tolerate quite a bit of mixing it is always better to add ingredients a little at a time to facilitate blending. You can not do that for recipes that minimize the development of gluten, like cakes, but you can here.
After the sugar, add the sour cream, also a little at a time. Go ahead and add the vanilla extract and lemon zest now. Be sure and use real vanilla extract. Cheesecake is expensive to make and you should use only the best ingredients.
Next blend in the eggs, one at a time. I mixed the cornstarch with the last egg until free of lumps and then added it. The purpose of the cornstarch is to absorb any liquid that might be released, as sometimes happens when a custard is overcooked or when cheesecake is made with things like ricotta cheese that is sort of watery. It is just sort of an insurance policy.
After everything is blended, scrape the filling into the crust. It is very dense. Be careful not to leave air pockets. You can not bang raw cheesecake in a springform pan on the counter to knock out air bubbles like you can cake batter. Place in the center of a 325 degree oven and place a pan of hot water on the rack under it. This keeps the cheesecake from drying out and actually decreases cooking time because since the oven is saturated by water vapor, evaporative cooling from the top of the cheesecake does not occur. Leave it in the oven for 70 minutes and do not open the door. Opening the door causes the temperature to fluctuate and custards are moody.
After the 70 minutes, turn off the oven and open the door to the first stop, about 1/4 way open more or less. Leave it there for at least an hour, and more is fine. The reason for this is to allow the cake to cool very slowly (actually, the center continues to cook for quite some time from heat conducted from the outer part) making it less apt to crack and/or leak liquid. Here is what mine looked like after two and a half hours of cooling:
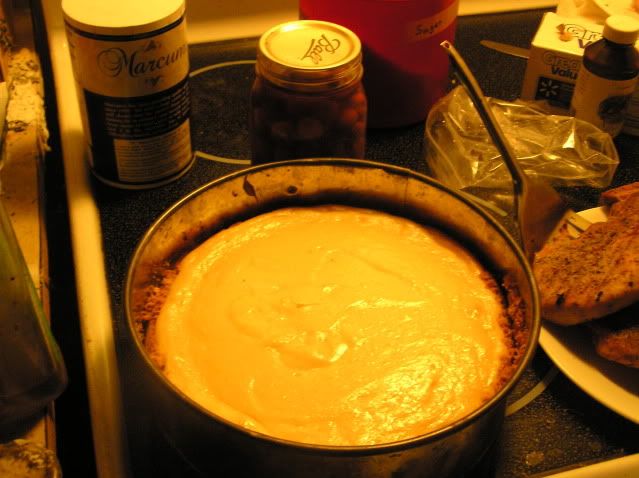
Note that there are no cracks in the surface. Saran or Great Value Premium wrap should then be gently pressed onto the surface of the cake to keep it from drying out and the whole springform pan refrigerated until the cake is completely chilled. Unless you started really early in the morning, this really means overnight. I specified these two types of wraps because they are oxygen barriers, being made of polyvinylidene chloride. Regular wrap is made of polyethylene and oxygen readily penetrates it. With so much fat, cheesecake is very apt to develop off flavors from contact with oxygen.
For the topping I used sour cherries, but you can use whatever you like. Some people like strawberries, some blueberries, and there are people who rave about a pineapple topping. You can also have no topping at all if you want. It is all a matter of personal preference. I followed the procedure in the recipe, but you can cheat and just buy whatever fruit pie filling that you like in a can. Just pop it in the refrigerator when you refrigerate the cheesecake. I am a “from scratch” cook, especially when it comes to something as special as a birthday cake for someone so special, so I did it the hard way, but the hard way is easy. I like to allow the fruit to sit in the syrup overnight in the refrigerator, then thicken and cool it the next day but it is not really necessary.
After the cake is cool, remove the sides of the springform pan and place the bottom of the pan containing the cake on a plate. I really needed to use a bigger one than I did, but it served. Spoon on the topping and serve. Here is what it looked like when it was finished.
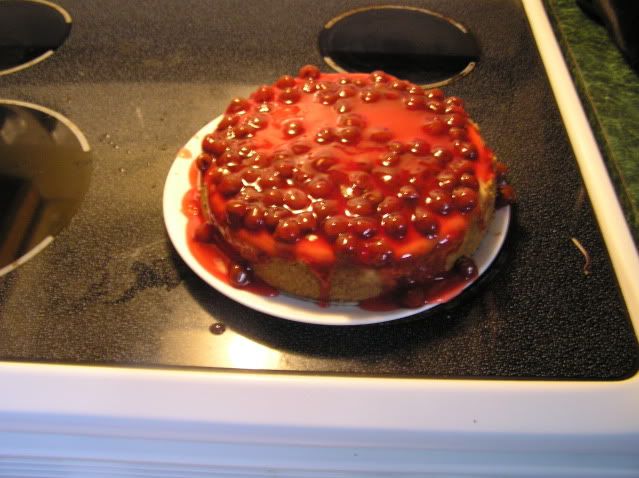
I was out of ice Monday so took the pan of hot topping over to The Woman’s house to cool it. She got a kick out of putting the topping on her cake herself.
Although you could not tell from the final product, this is the first real cheesecake that I ever made. You can not count the Jello stiffened kind that you “cook” in the refrigerator as a real cheesecake although they taste OK. The Woman, her mum and dad, and I all pronounced it delicious although The Little Girl was not as enthusiastic. I went back later Monday night to get seconds and half of the cake was already gone and The Woman divided what was left with me for me to take home. It will keep under refrigeration for quite a while, and I have never heard of a good cheesecake being around long enough to go off.
To review, the important steps in making a cheesecake successfully are:
- Allow all ingredients to come to room temperature before mixing
- Mix gently by hand to avoid entraining air that makes it rise and fall, and crack
- Add a little cornstarch as in insurance policy
- Cook gently so that you do not heat the outer regions of the cheesecake too much
- Put a pan of hot water under the cheesecake in the oven
- Do not open the oven door until it is cooked
- Cool gently to allow the center to cook through whilst the outer parts cool
- Chill completely before trying to handle
These steps apply to all cheesecakes in general unless the recipe specifically instructs you to do something different and for a specific reason. If they do not give a reason to deviate from these guidelines, use the guidelines.
This recipe uses what I consider to be just about the minimum of eggs to bind a custard, about one large egg per cup of other ingredients. If you are in doubt when you read a recipe remember that general rule of thumb for most custards: one large egg per cup of other ingredients. Adding a little more egg to a recipe that does not contain enough if fine, but you might want to put an extra teaspoon of sugar in the mix to compensate.
On a personal note, The Woman, The Little Girl, and I spent a lot of time together Monday. After The Little Girl went to bed the two of us were able to sit on her front porch and just have several really nice hours together, just talking about anything and everything. When it was finally time for me to go, we commented to each other about what a low key, pleasant, and actually joyous day it had been. It is nice to have someone to whom you can be completely yourself in front of with no worry about putting on airs. She and I are at that point, and it took a long time for that sort of emotional bond to be cemented.
Since we celebrated her birthday on Monday, a day early, I might as well show you the other gift that I got for her that day. It has become a tradition for me to give her roses and a vase for her birthday, so this is what I brought her Monday.

We could not get all three dozen roses in her new vase (on the left), so we had to put some of them in last year’s vase along with another bouquet that I had gotten for her the week before. Since her birthday last year, she has always had fresh flowers on her dresser when she was in town. I see to that.
This year I gave her 12 red, 12 white, and 12 orange roses. Those of you who are hip to meanings of different colors of roses, and the numbers of them, send a message. It is sort of like cooking in that often the same basic ingredients can be combined in different ways to make dishes with very different outcomes. I do not want to get much more specific than that, but if folks are really interested in the meaning can inquire in the comments, please be gentle and ask things like “What do orange roses mean?” rather than “So, what does your combination mean?”
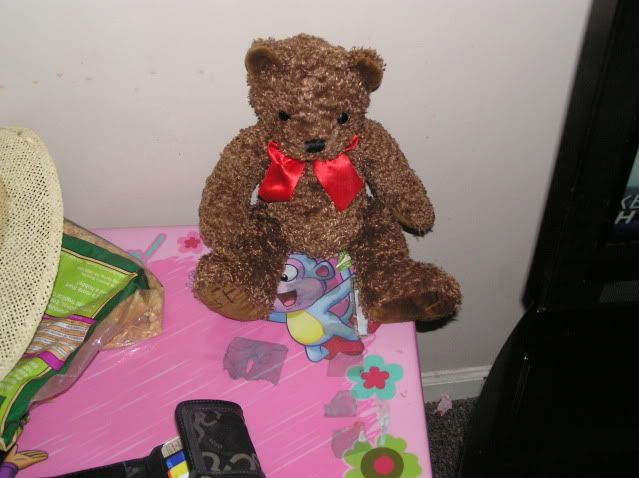
For the official celebration on Tuesday, I just gave her a little token. I thought that he was cute, though. Notice that he is atop The Little Girl’s Dora the Explorer table.
For my first attempt at a real cheesecake, I was extremely pleased with the result. Part of the reason for that success was that I did several hours of research on cheesecake, from dozens of recipes, the tips that Kossacks sent, and the wonderful second edition of On Food and Cooking by Harold McGee. If you do not have a copy of that book, find one. At 884 pages of small print, no color photographs, plenty of good illustrations, 14 pages of references, and 49 pages of index, it contains not a single recipe except for historical ones. This author is excellent. Alton Brown may have flash, but Harold McGee has the facts and presents them in what I find to be a very insightful, almost Geeky manner. Those of you who know me from my regular Sunday series here (Pique the Geek, at 9:00 PM) know that my use of the term Geeky is one of the highest honors that I can give someone.
Please bear with me whilst I wax philosophical. No one has to cook, and not everyone should! There are healthy alternatives to home cooking, and some folks just do not have time to cook. More and more grocery chains are beginning to provide healthful, already prepared dishes that need only to be taken home, and, at most, warmed. Some of the frozen entrees and dinners are actually surprisingly tasty, and some of those are actually pretty healthy. You just have to look at labeling to be sure that you are getting good stuff. If the community would be interested, I suspect that I could write a piece about that for here sometime. Please let me know in the comments.
For me, cooking is an expression of love. When I was with my family, I cooked all the time because most of it was for them. Sure, I cooked things that I liked, but they liked most of them as well. Living alone, I find myself cooking less and less, but when I do cook, it is almost always for The Woman, or with The Woman. Sometimes I will cook a bunch of stuff at once for myself, but that is to keep from having to cook more often, just warm up the stuff in the freezer.
But when I am cooking for someone else, the joy returns. Cooking for myself is a drudge; cooking for someone else is elating. Now, that someone else does not have to be someone dear, but it helps. I could never be a chef because the act is just too damned intimate to me.
You see, when you cook for someone else, what you give them becomes, literally, part of that person’s body! I can think of only one other activity that can make that claim (blood transfusions and organ transplants excepted), and that only works one way betwixt the genders. How much more intimate can you get?
That is why I think that pot luck dinners are a really good idea. People prepare their very best dishes to show off, and that is not a bad thing! I have had some of the best (and the worst) dishes that I ever sampled at pot lucks.
Well, that is it for tonight. I am writing on Wednesday, so it is possible that by posting time Saturday I will have figured out what I had for dinner that night. I should be available for comments most of the evening, since The Woman is out of town.
Warmest regards,
Doc, aka Dr. David W. Smith
Crossposted at
Docudharma, and

2 comments
Author
getting to love cooking again?
Warmest regards,
Doc
Author
I very much appreciate it.
Warmest regards,
Doc